Introduction
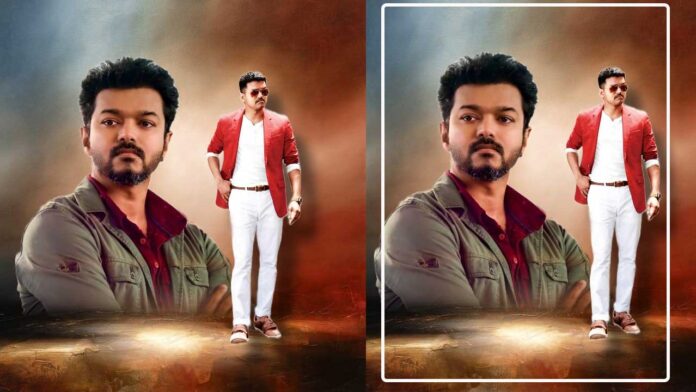
In this tutorial, we will explore how to edit two photos in PicsArt to create a cinematic poster-like composition. The focus will be on blending images seamlessly, adjusting sizes, and adding effects to enhance the overall look.
Step 1: Selecting Your Photos
The first step in creating a cinematic poster is selecting the right images. Choose one photo to serve as the background and another for the main subject. Look for high-resolution images with good lighting and composition to achieve the best results.
Step 2: Opening PicsArt and Importing Photos
Once you’ve chosen your photos, open PicsArt on your mobile device or computer. Import the background photo first by tapping on the “+” icon and selecting “Background” from your gallery. Repeat the process to import the second photo, which will be your main subject.
Step 3: Adjusting Sizes and Positions
Next, adjust the size and position of the background photo to fit the canvas. Use the pinch-to-zoom gesture to resize the image and drag it to the desired location. The background photo should cover the entire canvas and serve as the foundation for your composition.
Step 4: Adding the Main Subject
Now, add the second photo (the main subject) to the canvas. Position it in front of the background photo, making sure it complements the overall composition. If necessary, resize and rotate the subject to achieve the desired effect. Experiment with different placements until you find the perfect balance.
Step 5: Blending the Images
To create a seamless blend between the background and the main subject, use PicsArt’s blending tools. Experiment with different blending modes such as “Overlay,” “Multiply,” or “Soft Light” to achieve the desired look. Adjust the opacity as needed to enhance the effect and make the transition between the two photos smoother.
Step 6: Enhancing the Colors
To enhance the cinematic feel of your poster, experiment with color adjustments and filters. Use PicsArt’s tools to tweak the brightness, contrast, saturation, and hue of both photos until you achieve the desired color palette. Consider applying cinematic filters or presets to add depth and atmosphere to your composition.
Step 7: Adding Text and Graphics
Now it’s time to add text and graphics to your poster. Use PicsArt’s text tool to overlay titles, credits, or other information onto the image. Experiment with different fonts, sizes, and styles to find the perfect look for your poster. You can also add graphic elements such as shapes, icons, or illustrations to enhance the visual impact.
Step 8: Applying Effects and Filters
To give your poster a polished finish, experiment with additional effects and filters in PicsArt. Consider adding vignettes, lens flares, or grain effects to add texture and depth to your composition. Don’t be afraid to get creative and try out different combinations until you achieve the desired result.
Step 9: Fine-Tuning and Adjustments
Take a step back and review your composition as a whole. Make any necessary adjustments to the positioning, sizing, or effects to ensure everything looks cohesive and balanced. Pay attention to details and make small tweaks as needed to achieve the desired cinematic effect.
Download Image
Step 10: Adding Final Touches
Once you’re satisfied with the overall look of your poster, add any final touches or embellishments to enhance its visual appeal. Consider adding borders, textures, or overlays to give your composition a unique and polished finish. Don’t be afraid to experiment and let your creativity shine through.


